I've been busy sewing the last couple of days using a new-to-me technique. I've always been fascinated with the Disappearing Nine-Patch (D9P) pattern because of its versatility and ease in making a quilt that looks as though you spent a lot of time on it. Although there are several good tutorials for this pattern, I developed this tutorial so that even a beginner could master this fun technique.
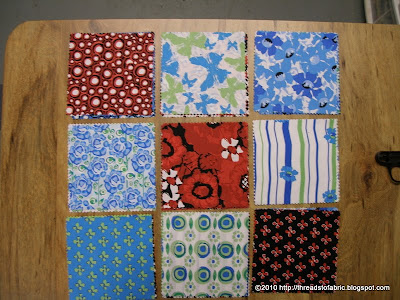
I started with two charm packs.
I separated the packs into colors because although my design will be scrappy, I wanted to use the red for my center block.
Next I laid out my nine-patches on my sewing table so that I could quickly assemble them.
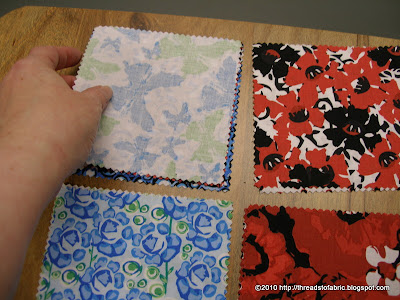
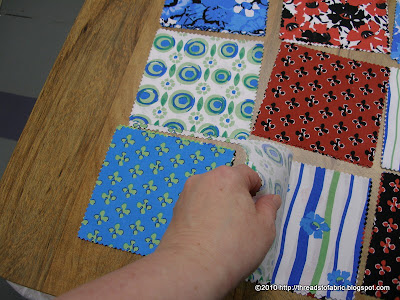
By following my planned layout, I placed the top middle square onto the upper corner.
Carefully lining up the edges.
Before sewing the 1/4" seam.
I followed the same process for the middle row.
And the third row.
I chose to press the seams as follows: For the top and bottom rows, I chose to press the seam towards the outer corners, For the middle row, I chose to press the seam towards the middle square. To achieve this, place the block you want the seam to be pressed towards on top before pressing.
The first step in pressing your seam is to set your stitches by pressing the closed seam.
After setting your stitches, you open up your seam and finger press it before pressing with your iron. I have found by finger pressing the seam first, it ensures my seams are opened fully and I retain the correct seam allowance and block size.
When pressing the seams, it is critical to take care and press in an up and down motion. If you move the iron back and forth, you risk distorting your fabric and you will have problems achieving accurate blocks or matching seams.
This is what my nine-patch blocks looks like at this point.
Repeat this process for the third block for each row.
After pressing the seams, it is time to join the horizontal rows.
Take the top row and place it onto the middle row, lining up the edges.
By pressing the seams using the method I did, I will be able to easily match my seams and achieve perfectly matched corners.
Lay the seams on top of each other.
As you slide the seams against each other, you can feel when they but up against each other. I prefer not to pin my seams, unless they are in more complex piecing patterns. However, the seams can be pinned to ensure the seams don't move while you're stitching the seam.
Once the seam has been matched, I hold onto it until just before the seam is stitched. Sometimes I will use a stiletto or wooden skewer to hold the seam in place until it is stitched.
Press the seam to set the stitches. I chose to press the seams towards the top and bottom horizontal rows.
Perfectly matched seams. Follow the same process with the third horizontal row
Here are my five nine-patch blocks.
The next step is to make a horizontal and vertical cuts down the center of my nine-patches. Because I started with 5" charm squares and I used 1/4" seams, I measured 2.25" from the seam to find my center of the middle vertical row.
Cut through the center.
Turn each half and follow the same process to find the center and cut.
Each section was squared to 7" before I played with them on my design wall.
I placed the squares on my design wall and played around with the layout. Once I chose the layout I wanted I reassembled the 7" blocks into larger blocks by joining four per block. I then squared up the larger blocks to 13.5" before joining them. The final row consisted of four 7" blocks which I joined into one row before adding it to the upper section.
I decided to add two borders to finish the quilt top. The red border was cut 1.5" in width for a finished 1" wide border. The outer border was cut 5" in width for a 4.5" finished width. To determine the length, I measured the center for both horizontal and vertical strips. By measuring the center I won't have to worry about sagging borders. Also, the border strips were cut on the grain to prevent stretching of the strips.


14 comments:
Wonderful tutorial, Dena - I think you will have a lot of fans!
Hugs - Lurline♥
Wow - great job!
I love the D9 patch!!
Great job on the tut!
Fantastic detailed tutorial! I think I will go make one now!LOL!
Great tutorial Dena!
Great tutorial. I've made several table runners this way, but you've inspired me to make something bigger! I have to admit I was doubtful about your color selections, but it turned out beautiful. You just never know!!!
Just love your blocks. Great colours. D9 would be one of my favourite blocks.
http://maria-lifeontheblock.blogspot.com
This is one of my favorite patterns! I love how yours turned out!
I love the disappearing nine patch. I have taught it to a few people also. I have made several lap quilts with it too.
How clever! The end result is amazing.
What a clever way to do it! You are amazing.
I LOVE it Dena!! I don't think I have a picture of mine, and it went to live in a new home. LOL
hugs,
Cheri
Great tutorial Dena! 8-)
I've got 3 of those reds in my stash too! It was a surprise to see them here! lol! 8-)
How big is this quilt you used for your tutorial? A twin size? My son wants to make a quilt and the disappearing nine patch was suggested as an easy pattern to start (he's only 11 and a half). Thanks for any advice you can give on how many patches we might need for that size...
Denise in Canada
Post a Comment