Monday, December 13, 2010

Birthday Swap Block - Joseph's Delight

Here is another block I've completed for the Birthday Swap I'm participating in.


This one is for my friend Deana and the block is called Joseph's Delight. It's a 12-inch block and she had requested it be made in burgundy or teal shades with a WOW background. I like the block and think it would be perfect in a scrappy quilt or perhaps batiks.

Well, the year is almost over and I'm finishing my final catch-up block. Afterwards I'll assemble the final block for this swap. Hard to believe the year has passed us by already. I'll be posting information on my next block in the next day or two. In the meantime, what are you working on? Anything special planned for the new year?

Thursday, December 9, 2010

Another Birthday Swap Block

In my last post I mentioned I had been working on a couple of my blocks for the Birthday Swap I'm a participant on and I thought I'd share one of them with you today.

I'm a little behind on my blocks but I'm still creeping along in an effort to catch-up. I think everyone joins swaps with the best of intentions and don't anticipate the hiccups life throws in our directions...


My friend Billie wanted a block of trees in any size divisible by 3. I chose a paper-pieced pattern by Carol Doak from her book titled Three Hundred Paper-Pieced Quilt Blocks. I love Carol Doak's pattern because most of her books come with a CD of the patterns that you can dictate the size and print out on the appropriate medium. She also includes the cutting dimensions of each piece which you can use if you're using the original sized pattern.  Even though I'm a little late with these blocks, I'm hoping Billie with enjoy receiving them and using them in one of her projects.

If you're a little timid in using a paper-piece pattern, you can use my tutorial to guide you through the process. I know how frustrating it can be to learn a new technique and I was beyond frustration when I tried to teach myself how to paper-piece until my friend Diane sat down with me and taught me the basics. I'm forever thankful for her patience and teaching abilities because I now have the ability to enjoy incorporating this method into my quilting projects.

I'll be highlighting more of my Birthday Swap blocks soon. In the meantime, why don't you tell me what you're working on.

Monday, December 6, 2010

Peeking Out From Under Scraps

Gosh, I hadn't realized it had been this long since my last post. I've been so busy... Time sure does fly!

I was a little busy preparing for the Thanksgiving Holiday as the kids and grand kids were going to invade our quiet home. It is quite a job child-proofing a home. Then we had a miniature snowstorm the week of Thanksgiving putting everyone in high-gear before the day even arrived. I tried doing my shopping for our Thanksgiving meal and it was so crowded in the store I couldn't fit my grocery cart down the isles. Instead I had my husband stay with the cart at the end of each isle while I squeezed my way to find the items I needed. As we were shopping there was a small child expressing their unhappiness. Very loudly, I might add. I felt for the parents because I know how miserable children are when it's nap time. We survived the battle of the grocery stores. All the children and grandchildren arrived safely and we spent a few days playing games, making tons of food, and sharing laughter. I hope your holiday was as enjoyable as mine was.

Well, Thanksgiving isn't the only thing keeping me busy... I've spent countless hours in my sewing studio. I have some pictures to share and I'll start with this one today.


My grandson Elijah celebrated his 4th birthday on Thanksgiving. That is Elijah with his mom and friends at his party. We had his party a week before his birthday because he was celebrating his birthday in Disneyland this year. I made him a quilt for his birthday:


Here is the quilt prior to adding the borders.

Here is the finished quilt. He hasn't received it yet because I wasn't able to finish it before he left for Disneyland (All those darn power outages cut into my quilting time.), but he knows I have something special waiting for him.

The quilt design is called Warm Wishes and is available as a free pattern from Quiltmaker Magazine. It is such a simple pattern that goes together quickly. Perfect for someone wanting to make their first quilt or needing a quick gift. I finished it with freemotion quilting using a meandering design. I'm just not confident in my machine quilting skills to try anything more complex yet. In fact, the entire time I was quilting I kept hearing Obi-Wan Kanobi's voice in my head saying, "Don't cross the stream Luke! Let the Force be with you."

Have I lost it, or what? LOL

What is everyone else up to?

Thursday, October 7, 2010

A Different Kind of Art

Where does the time go? It seems like just a couple of weeks ago we were celebrating the late arrival of our summer and as I sit writing today's post, I am listening to the wind howling while watching the stampede of leaves floating to the ground. What a colorful carpet they make! I love all the vibrant colors of fall and Washington State is the perfect place to enjoy the beauty.

I live outside a small town called Sedro-Woolley located near the foothills of the Cascade Mountain Range. Years ago there were two towns named Sedro and Woolley separated by the Skagit River and the people of these towns decided to merge, becoming one. Most of the families have lived here for generations, supporting themselves by the logging, fishing, or farming industries. Of course, today, we have fewer farms and an endless book of restrictions causing many families to move to other industries for survival, including a couple of oil refineries located in nearby Anacortes and Ferndale, but logging is in the heart of the community.

Every year the town hosts a celebration called Founders Days where there are several events for everyone's enjoyment. One of these events is the re-enactment of the infamous 1914 bank robbery. Locals act out the robbery in the middle of town to newcomers amazement. 

Another local event is the annual Loggerodeo held every summer. The event stretches from one end of town to the other for a total of five or six blocks. There is the usual traveling carnival and vendor food you would expect to find, but something you may not expect, and one of my favorites, is the competition of chainsaw carvings.

In one of the parking lots there is a supply of logs that by the end of the weekend will be transformed into beautiful pieces of art. Many of the previous year's entries line the main street of town and I thought I'd share them with you.


It always amazes me at the amount of detail these artists are able to accomplish with the use of a chainsaw. I love the eagle displayed on the bench. Each year there is an eagle festival held in a neighboring town called Concrete. Perhaps next year I will travel up there so I can get some pictures of all the eagles as they feast on the fish in the river.

Just to make this somewhat quilty, I'm posting a picture of my cutting table as it looks today:


And here is one from the other angle:


Yes. I know. It is a little difficult to get any sewing/quilting done when there isn't any room... Not to mention my Pfaff machine is still packed up from my last sew-in. 

So what have you been doing?

Monday, September 13, 2010

What I Did This Summer...

Hello? Hello? Is anyone out there? Testing... One, two, three. I know I have been absent as though I was on summer vacation like a regular school girl. I wish I could say I was busy having fun playing with friends, riding my bike, swimming in the lake at family picnics and enjoying all that the summer sun has to offer. But, alas, I can't. Life has kept me busy and I let myself get into a... Well, I'm not sure what to call it. A good friend of mine likes to use the term funk. So, in taking a cue from my friend Diane, I guess I've allowed myself to slip into a 'funk'. How do you pull yourself back up? How do you force yourself back into the streamline of life among everyone else? 

I've scarcely touched my emails and haven't been in my sewing studio in about three months. I walk past it and glance at the chaos I've allowed to nest. Unfinished projects tossed around in piles. Discarded like an old worn out book whose pages are too faded to read. One of my sewing machines is still in its case from the last sew-in I attended a few months back. Untouched along with the projects I took to work on. My family and friends would be shocked to see the discord. The disorganization I've allowed to take hold of my sanctuary. My sacred place of comfort.

I recently heard a discussion regarding Professor Randy Pausch and his last lecture.   I haven't heard his lecture, but in it he states that in the game of life you must decide whether you are Tigger or Eyeore. And only after you identify who you are can you learn how events in your life affects  you and how you affect your life. I'm paraphrasing based on what I heard. But it really made me think about the state I've been in for the last few months and how I'm the one who has the power to make changes. 

I want to thank everyone who has sent emails and left messages expressing concern. I really have made some wonderful friends and am thankful for each one. I won't get into the pieces of my life that have caused me to retreat into solitude. I will, however, say that I'm working on changes and hope to be regularly posting to my blog again soon as I make my way back into my sewing studio and life again.


Monday, May 17, 2010

Another Finished Quilt Top...

I can't believe I've completed two quilt tops in two weeks. See what happens when I'm given a challenge? I guess all I needed was a good swift kick! LOL


I started with three prints. One yard of the molted orange/red, one yard of the floral, and one-half yard of the yellow. I then cut them into 5" squares, 48 squares for the orange/red and floral prints, and twelve of the yellow print.


I then stitched them into twelve nine patches. Following the same technique as in my earlier Disappearing Nine-Patch, I cut my nine-patches into four equal pieces, squared them into 7" squares and put them onto my design wall...


Using the same design layout I laid my blocks into the design; six blocks across and eight blocks down. Above is what it looked like after assembling.


I added two borders. The yellow border was cut 2" for a 1.5" finished border and the orange/red border was cut 6" for a 5.5" finished border.


Here is my finished quilt top. It is hard to believe this is the same pattern as my scrappy D9P quilt from last week. I'm calling this Citrus Splash because it makes me think of oranges, tangerines, and lemons.

Now, how should I quilt these two tops?

Monday, May 10, 2010

Disappearing Nine-Patch Tutorial

I've been busy sewing the last couple of days using a new-to-me technique. I've always been fascinated with the Disappearing Nine-Patch (D9P) pattern because of its versatility and ease in making a quilt that looks as though you spent a lot of time on it. Although there are several good tutorials for this pattern, I developed this tutorial so that even a beginner could master this fun technique.

I started with two charm packs.

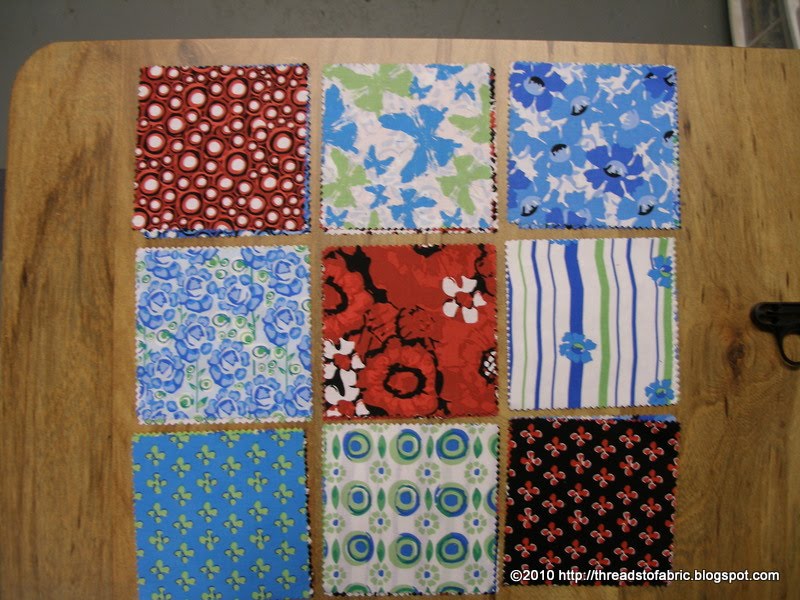
I separated the packs into colors because although my design will be scrappy, I wanted to use the red for my center block.

Next I laid out my nine-patches on my sewing table so that I could quickly assemble them.

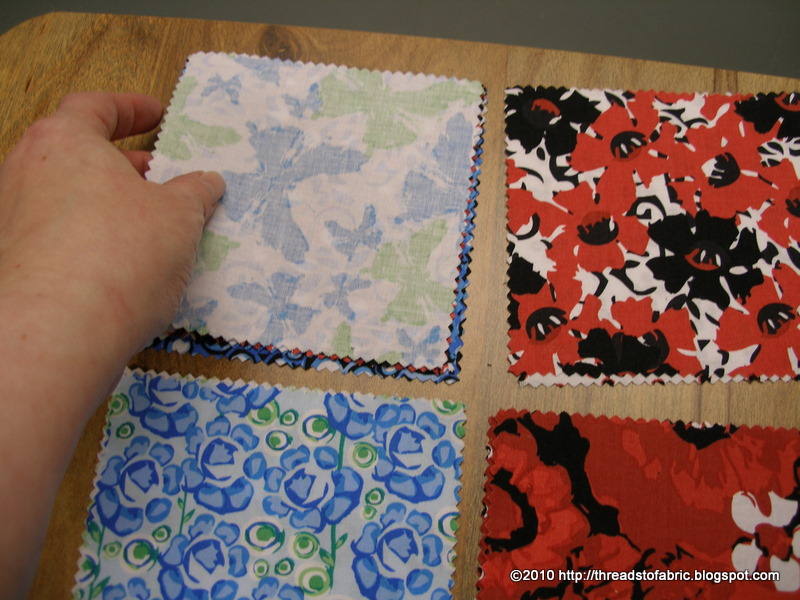
By following my planned layout, I placed the top middle square onto the upper corner.

Carefully lining up the edges.

Before sewing the 1/4" seam.

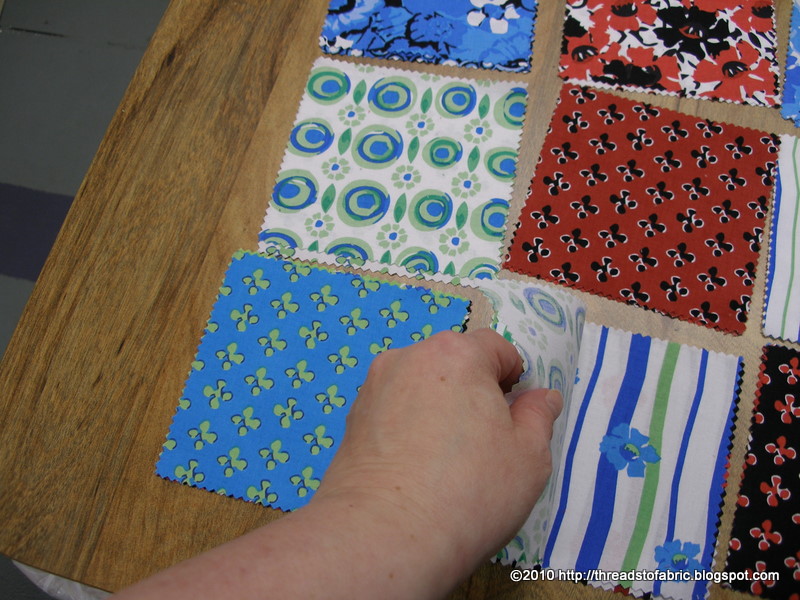
I followed the same process for the middle row.

And the third row.

I chose to press the seams as follows: For the top and bottom rows, I chose to press the seam towards the outer corners, For the middle row, I chose to press the seam towards the middle square. To achieve this, place the block you want the seam to be pressed towards on top before pressing.

The first step in pressing your seam is to set your stitches by pressing the closed seam.

After setting your stitches, you open up your seam and finger press it before pressing with your iron. I have found by finger pressing the seam first, it ensures my seams are opened fully and I retain the correct seam allowance and block size.

When pressing the seams, it is critical to take care and press in an up and down motion. If you move the iron back and forth, you risk distorting your fabric and you will have problems achieving accurate blocks or matching seams.


This is what my nine-patch blocks looks like at this point.

Repeat this process for the third block for each row.

After pressing the seams, it is time to join the horizontal rows.

Take the top row and place it onto the middle row, lining up the edges.

By pressing the seams using the method I did, I will be able to easily match my seams and achieve perfectly matched corners.

Lay the seams on top of each other.


As you slide the seams against each other, you can feel when they but up against each other. I prefer not to pin my seams, unless they are in more complex piecing patterns. However, the seams can be pinned to ensure the seams don't move while you're stitching the seam.

Once the seam has been matched, I hold onto it until just before the seam is stitched. Sometimes I will use a stiletto or wooden skewer to hold the seam in place until it is stitched.

Press the seam to set the stitches. I chose to press the seams towards the top and bottom horizontal rows.


Open up the seam by finger pressing before pressing it with the iron.

Perfectly matched seams. Follow the same process with the third horizontal row

Here are my five nine-patch blocks.

The next step is to make a horizontal and vertical cuts down the center of my nine-patches. Because I started with 5" charm squares and I used 1/4" seams, I measured 2.25" from the seam to find my center of the middle vertical row.

Cut through the center.

Turn each half and follow the same process to find the center and cut.

Each section was squared to 7" before I played with them on my design wall.

I placed the squares on my design wall and played around with the layout. Once I chose the layout I wanted I reassembled the 7" blocks into larger blocks by joining four per block. I then squared up the larger blocks to 13.5" before joining them. The final row consisted of four 7" blocks which I joined into one row before adding it to the upper section.

I decided to add two borders to finish the quilt top. The red border was cut 1.5" in width for a finished 1" wide border. The outer border was cut 5" in width for a 4.5" finished width. To determine the length, I measured the center for both horizontal and vertical strips. By measuring the center I won't have to worry about sagging borders. Also, the border strips were cut on the grain to prevent stretching of the strips.